04.03.2025
Education
Why High Speed and Low Costs Are Needed for Mass Adoption of Web3

Somnia’s new World Builder allows you to create anything you imagine from virtual worlds and experiences to fun games, even if you aren’t an expert coder. In our newest tutorial, we show you the basics and walk you through how to get started with creating your own unique worlds and experiences.
Accessing the MML Editor
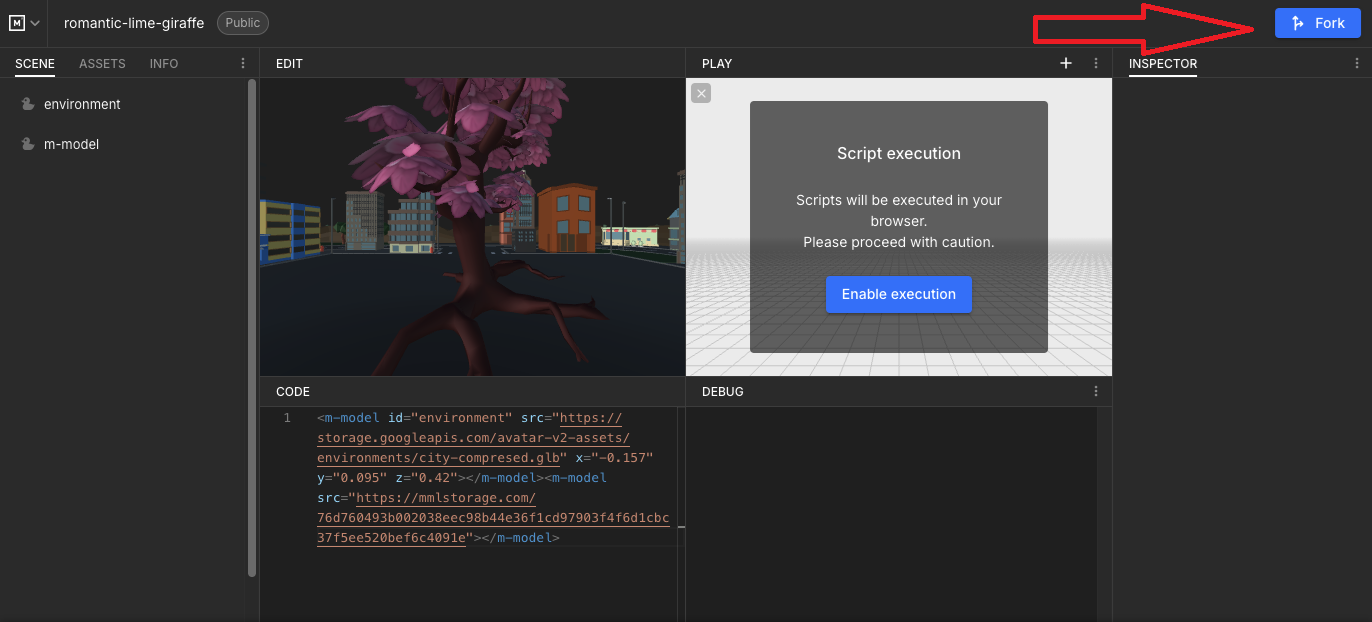
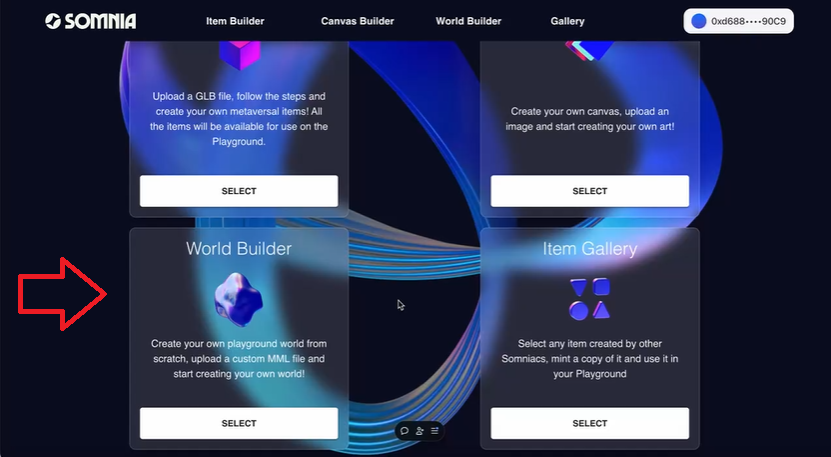
To start building a new world, you’ll need to go to the MML editor, a tool used to create complex MML objects. Somnia will provide you with three premade projects, the Somnia City, the Village, and a blank slate that allows you to start from scratch.
When you click on any of the provided links, the first step is to fork the project by selecting the “Fork” button at the top of the screen. This creates a separate instance that only you can edit, preventing interference from others.
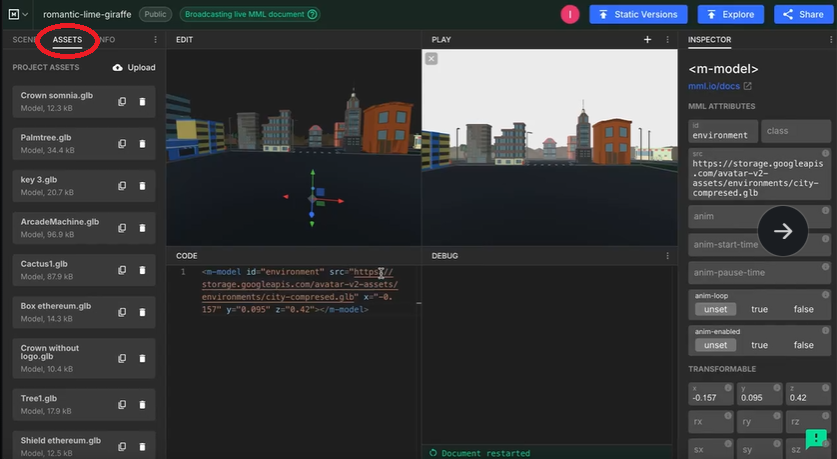
Exploring the Preloaded Assets
All assets used in Somnia’s Playground are already preloaded into these projects. You can start modifying the objects directly using the “Assets” tab of the MML editor.
Using MML Primitives
If you’re familiar with MML, you can easily add different preset primitives like cubes, spheres, or other shapes from the menu in the “Scene” tab on the left of the screen.
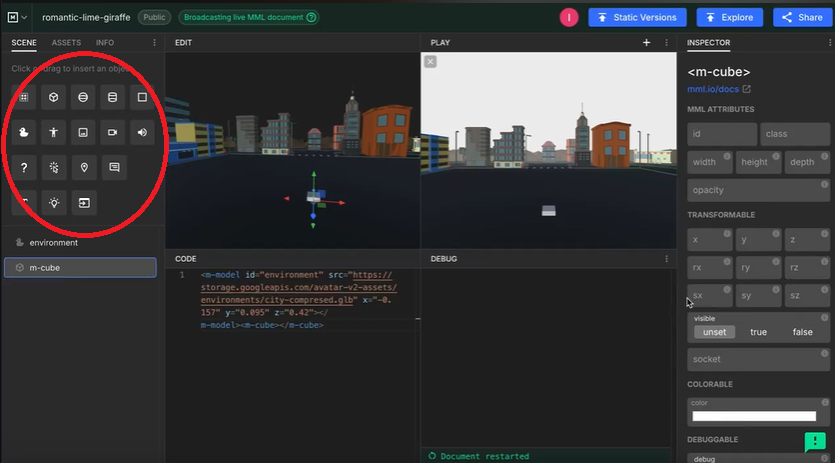
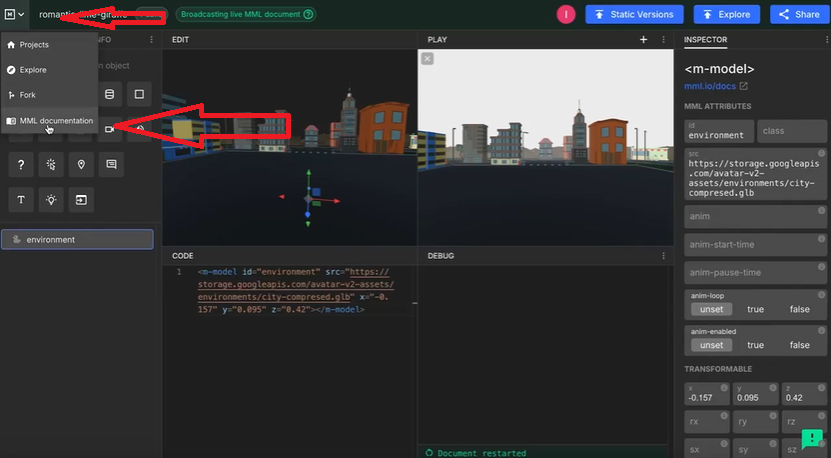
If not, the MML documentation is available in the top left drop down menu.
You can modify objects using the scroll menu on the right of the screen.
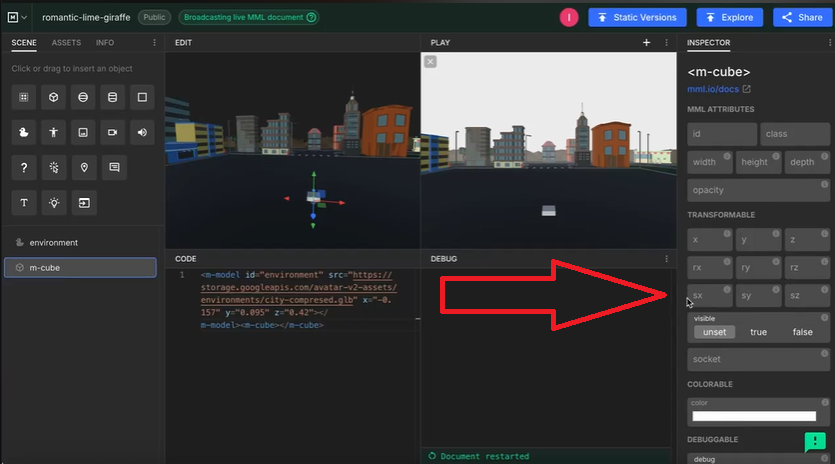
Here are some key parameters for modifying objects:
Building the World
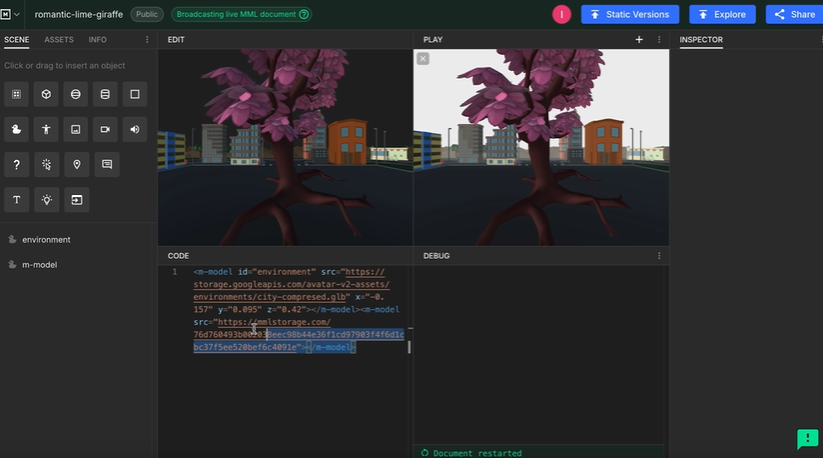
For this guide, let’s build a world based on the Sakura tree. We placed a giant Sakura tree in the middle of our city to get our world started. We found the Sakura tree in the preset assets that we told you about earlier. Then, by dragging and dropping the Sakura tab from the assets menu into the edit field, we generated a code that we’ll be able to use for the World Builder.
Once you’ve created your desired environment in the editor, you can copy the code from the editor window.
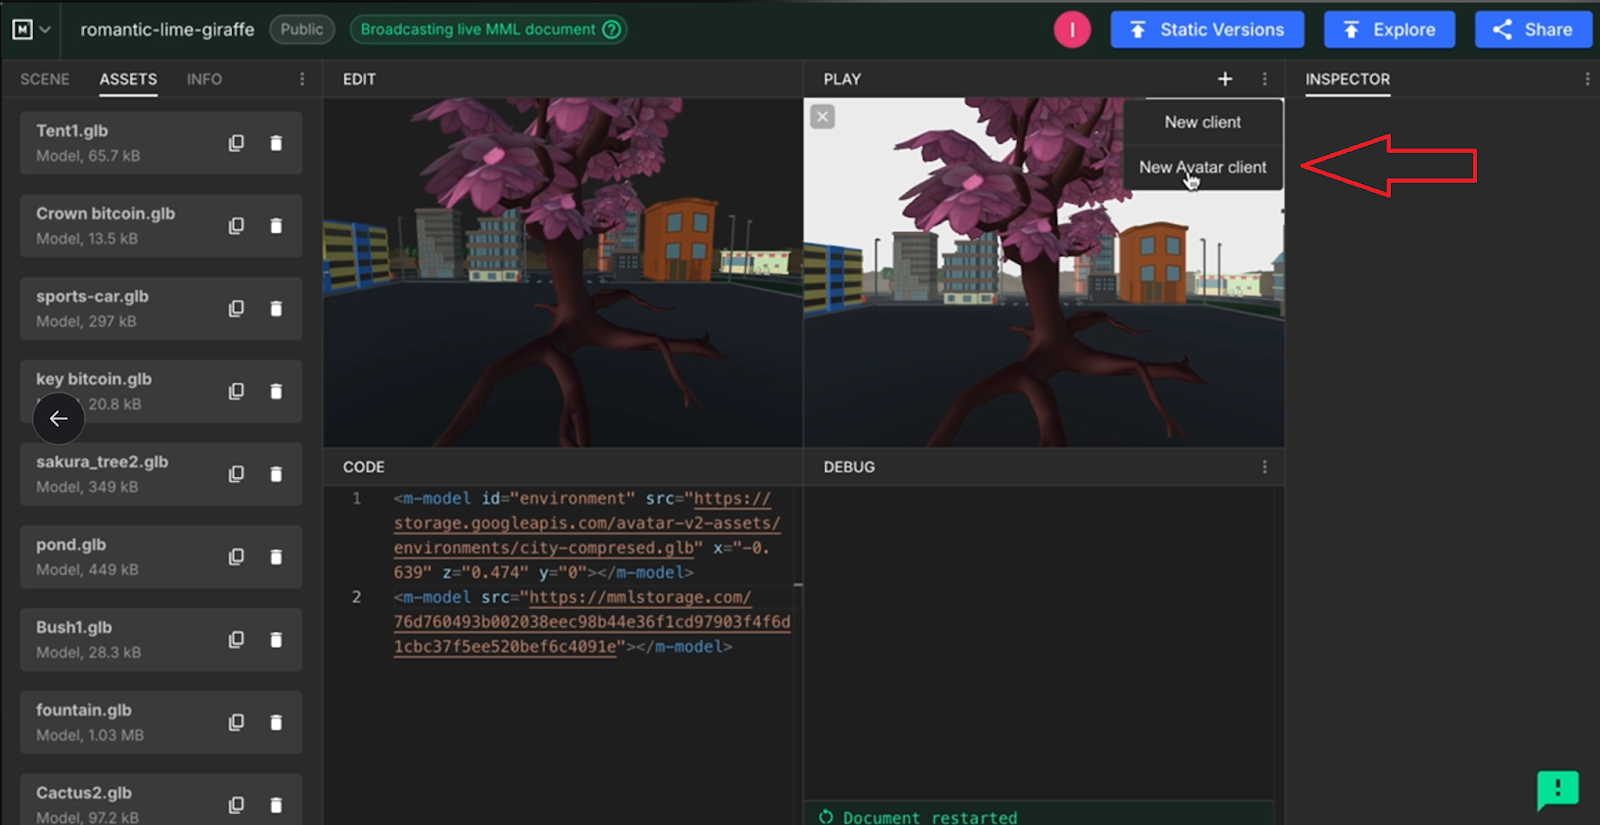
You can also preview your world, to see that everything is the correct size, by opening the drop down menu on the top of the box on the right, and clicking “New Avatar Client.” This will generate your world with an avatar so you can see how large your items are.
Preparing for the World Builder
After copying the code, you’re ready to take it into the World Builder. This is where you’ll paste the code, add metadata, mint the world as an NFT, and see your creation live in Somnia’s playground.
Using the World Builder
In this section, you’ll take the world you built in the MML editor and finalize it in the World Builder. Navigate to the World Builder area and paste the code you copied from the MML editor into the designated code box.
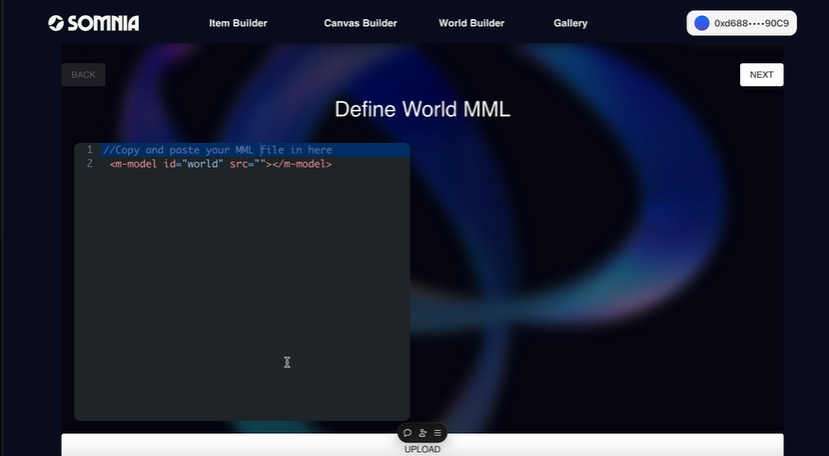
Go back to the MML editor to get the code you generated there, and paste it into the world builder.
Hosting Assets
You don’t need to upload assets separately in the World Builder because the MML editor handles asset hosting for you.
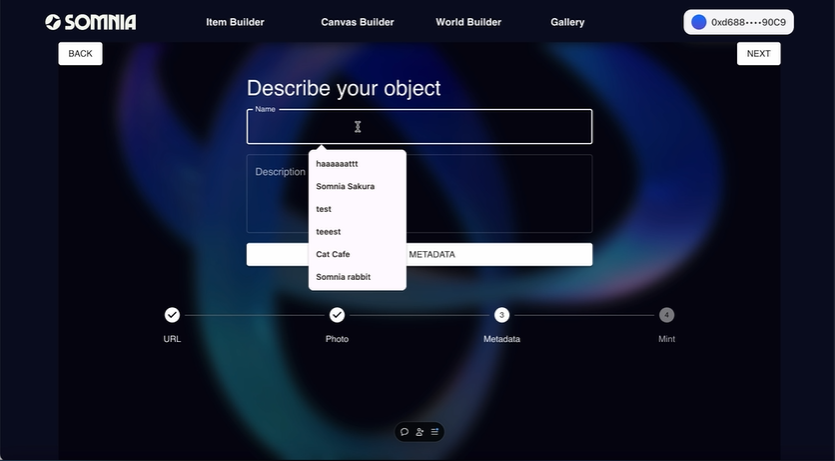
Uploading and Metadata
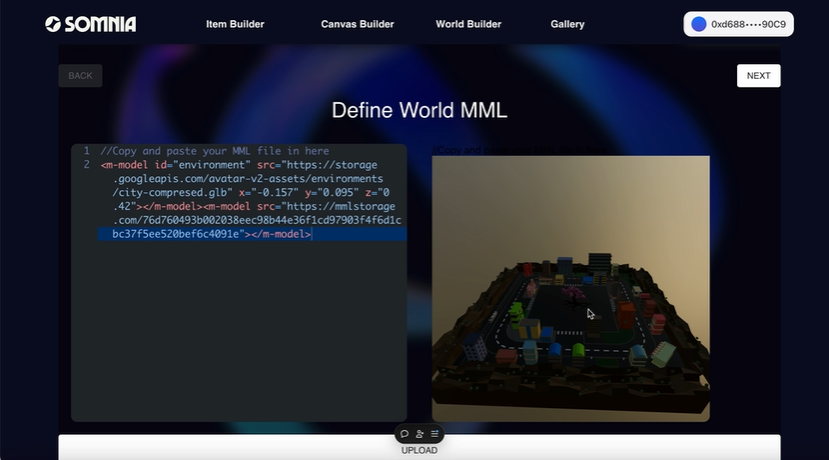
Once the code is pasted, you can inspect your world to ensure everything looks right. Then, click Upload and proceed with adding metadata. Name your world (e.g., “Sakura World”) and provide any other details needed for identification and categorization.
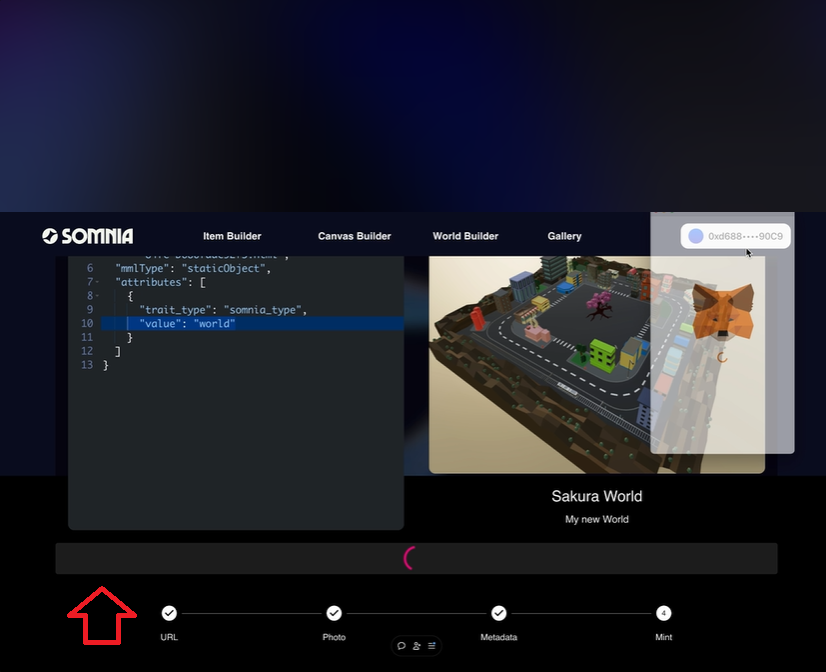
Minting the World
After saving the metadata, you will mint the world as an NFT. The metadata includes vital information like object type and world value, which the playground will recognize.
Accessing the Playground Workspace
Once you’re ready to upload your world, navigate to your playground workspace. You will find a section for created worlds and world themes. Here, you’ll see default worlds provided by Somnia and any custom worlds you’ve created.
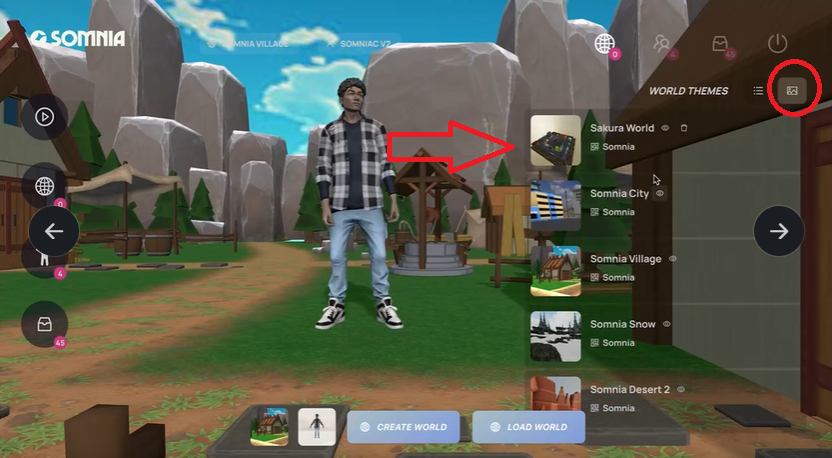
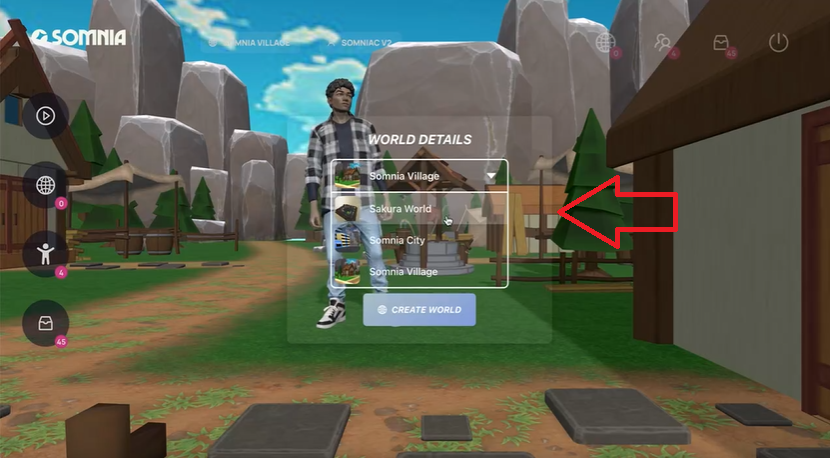
Creating Your Custom World
After creating a world, it will appear in the list. For instance, after creating the Sakura World, it showed up with a thumbnail image. Select your custom world by clicking on it. Next you will see a pop up asking you to confirm and create your world.
Viewing in the Playground
Once minted, your world will automatically appear in your playground workspace if you’re using the same wallet address. You can also visit the gallery to view and load your world.
Now you know the basics of how to use the MML Editor and the World Builder to create unique virtual environments and experiences. Share what you make with the world builder in the discord community!
Twitter – Discord – Telegram – Reddit – Lightpaper – OnePager